
How to Install a Car Seat

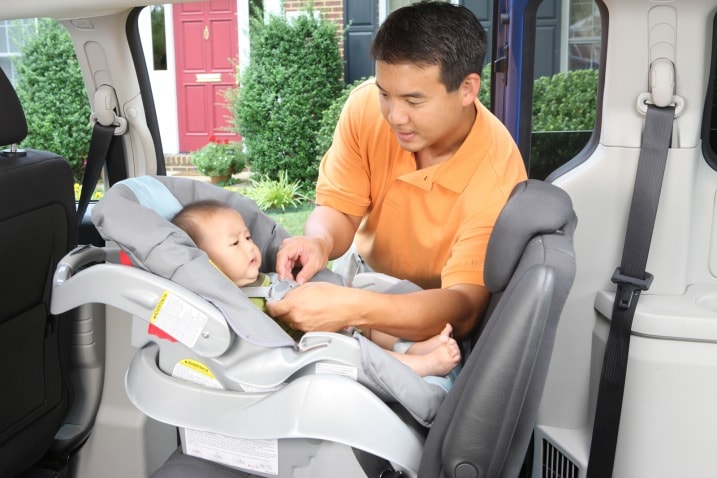
Among the many daunting challenges for parents of young children is learning how to install a car seat for your infant or toddler — and being confident that you've done it correctly.

If you're a parent, you might fret over this task, but there's no reason to go it alone. Help is available in many forms; child car-seat inspection stations and certified child-passenger safety technicians abound. The AAA Car Seat Guide has a wealth of car-seat safety resources, and the organization hosts installation clinics in many cities. In addition, the National Highway Traffic Safety Administration offers detailed instructions at safercar.gov.

Installing a car seat can be complicated, but videos and expert help can make it easier.

Installing a car seat can be complicated, but videos and expert help can make it easier.

Courtesy of NHTSA, here are the basics, including videos, on how to install seats for an infant or an older child. These apply whether you are using the seat-belt system or the system known as LATCH (Lower Anchors and Tethers for Children) that is installed in most newer vehicles. You can find more videos at the Parents Central section of safercar.gov.

Remember, the first and most important step in installing any car seat should always be a careful reading of the manufacturer's instructions and owner's manual. But these directions and videos should make the process much clearer, and you can always seek extra help from a technician or a veteran parent.


See Edmunds pricing data

Has Your Car's Value Changed?

Used car values are constantly changing. Edmunds lets you track your vehicle's value over time so you can decide when to sell or trade in.

Price history graph example

Infants

Rear-Facing Seat With Seat Belt
Seats for infants typically are made with a base. The base stays in the car, and the removable seat helps you transport your baby easily.

To install this type of seat using the seat-belt system, follow these basic steps.

  • Place the car seat base in the back seat of your vehicle, then thread the seat belt through the rear-facing belt path.
  • Buckle and lock the seat belt.
  • Test the base. Press down firmly and tighten the belt if necessary.
  • Give it the 1-inch test. The seat base should not move any more than an inch side to side or front to back.
  • Be sure the base is at an angle that allows your baby to sit semireclined. This keeps the infant's airway open.
  • Adjust the seat so your baby will be in that position. Most car seats have built-in angle indicators to make this easier.
  • With your baby in place, position the harness. The straps should lie flat and be placed through slots just below the infant's shoulders.
  • Buckle the harness and chest clip. Be sure it's snug.
  • The chest clip should be at armpit level.

Rear-Facing Seat With LATCH

If your car is equipped with the LATCH system, and you have decided to use it, follow these steps to install a rear-facing infant seat.

  • Place the car seat base in the back seat of your vehicle.
  • Locate your vehicle's lower anchors in the back seat. Typically, only the outboard seats (those nearest the windows) have anchors.
  • Attach the clips on the lower straps of the car seat base to the lower anchors, being sure to smooth the straps so they are not twisted.
  • Press down on the base as you tighten the straps.
  • Give it this test: Grab the base and push it hard in all directions. The base should not move more than an inch front to back or side to side.
  • Test the recline angle. It should allow your infant to sit semireclined so the baby's airway is open. Adjust the base so the angle is correct.
  • Attach the carrier to the base, and with your child in the seat, position the harness. The straps should be flat, without twists, and threaded through slots below your baby's shoulder level.
  • Buckle the harness and the chest clip. Tighten so the harness is snug.
  • Position the chest clip at armpit level.

Older Children

Rear-Facing Convertible Seat With Seat Belt

  • Place the car seat in the back seat of the vehicle, facing the rear.
  • Thread the seat belt through the rear-facing belt path of the seat, and be sure there are no twists in the belt.
  • Buckle and lock the seat belt.
  • Press down firmly on the seat and tighten. If your car seat requires a locking clip, install it now.
  • Give it the test: When you press on the seat, it should not move more than an inch front to back or side to side.
  • Heed the angle indicators so the seat is angled correctly.
  • With your child in the seat, position the harness. Be sure its straps are flat, with no twisting, and are threaded through the slots at or below your child's shoulder.
  • Buckle the shoulder harness and the chest clip. Tighten so there's no slack in the straps.
  • Put the chest clip at armpit level.

Rear-Facing Convertible Seat With LATCH

  • Place the seat in the back seat of the vehicle facing the rear.
  • Locate the lower anchors, then attach the lower straps on the car seat to the anchors, being sure there are no twists.
  • Press down on the car seat as you tighten the straps.
  • Give it the test: You should not be able to move the seat, either side to side or front to back, more than an inch.
  • Use the angle indicators or adjusters to be sure the car seat angle is correct.
  • With your child in the seat, position the harness so the straps are flat, without twists, and are placed through the slots below your child's shoulders. Buckle the harness and chest clip and be sure there's no slack in the straps.
  • Be sure the chest clip is at armpit level.

3-in-1, Combination or Convertible Seat, Forward-Facing, With Seat Belt (or Seat Belt and Tether)

  • Place the car seat in the vehicle's back seat, facing forward.
  • Thread the seat belt through the forward-facing belt path, being sure not to twist it.
  • Buckle and lock the seat belt.
  • Press down firmly on the seat as you tighten. If your car seat requires a locking clip, install it now.
  • Test it: You should not be able to move the seat side to side or front to back more than an inch.
  • To use the tether, connect the top tether strap on the seat to your vehicle's anchor for the tether and tighten.
  • With your child in the seat, position the harness so that the straps are flat, not twisted, and through the slots at or above your child's shoulder.
  • Buckle the shoulder harness and the chest clip. Tighten, being sure the harness is snug and no extra strap material remains at the shoulder.
  • Put the chest clip at armpit level.

3-in-1, Combination or Convertible Seat, Forward-Facing With LATCH

  • Put the seat in the vehicle's back seat, facing forward.
  • Attach the car seat's lower straps to the lower anchors in your vehicle, keeping the straps free of twists.
  • Press down on the car seat and pull the lower straps tight.
  • Give it the test: When you grab the seat and push on it, it should not move more than an inch side to side or front to back.
  • Connect the top tether of the car seat to the tether anchor in the vehicle, then tighten.
  • With your child in the seat, position the harness so the straps are flat and through the slots at or above your child's shoulders.
  • Buckle the harness and chest clip, tightening it so you can't pinch any extra strap material at the shoulder.
  • Put the chest clip at your child's armpit level.

Boosters

When your child weighs enough, you can transition to a booster seat. Here are some tips from NHTSA:

  • High-back boosters are recommended in vehicles with a low seatback. They give your child's head enough support.
  • Backless boosters are acceptable if your vehicle's seat or headrest provides enough support for your child's head.
  • Seats known as combinations or 3-in-1s can be converted to a high-back booster by removing the harness.
  • Booster seats are always placed in the back seat.
  • With your child in the seat, fasten the seat belt and be sure that the lap belt fits properly, meaning that it sits across the upper thighs.
  • Put the shoulder belt in the correct position, which is across the chest and across the middle of the shoulder.


2024 Ford Bronco Sport


2024 Ford Bronco Sport

2024 Ford Bronco Sport

The Ford Bronco Sport is one small crossover that can tackle terrain and look good doing it.
Learn More